

Textured Circles no. 12 – Featuring *NEW* Shell Lace Border – Made its way to the UK!
Related Links
-
Main page for this blanket design (Including at-a-glance gallery)
- Free square pattern
- My original method of joining the squares (Flat Braid Join)
- Order this blanket as a custom piece
* * *
This fluffy dream has a new type of border that I created as a lace alternative. I took notes along the way and made a tutorial for the join!
I’ve adored coming up with different lace borders to go around the Circle of Friends square for my latest Textured Circles blankets. This blanket is extra thick with two strands of worsted weight yarn with a size 10mm hook. Through trial and error, I made a lace that was suitable for the double-stranded thickness. To see the more open lace that I created for my single-stranded version with 6.5mm hook, click here (Textured Circles with Celtic Lace Border – coming soon).

Shell Lace Border
To begin (US terms): Join with a slip stitch with border color in any corner SC. Work 3 SC in the same corner stitch, and work SC in all stitches around, making sure to put 3SC in the corners.

Join with a slip stitch to the first SC.

In the corner stitch, (SC, chain 1) (Counts as DC here and throughout the blanket). (Chain 2, 2DC) in same corner stitch. ***Skip 2 stitches, (2DC, chain 1, 2DC) in next stitch *Shell made* skip 4 stitches, Shell, (skip 3 stitches, Shell) 3 times, skip 4 stitches, Shell, skip 2 stitches, (2DC, chain 2, 2DC) in corner stitch***
Repeat from *** to *** 2 more times.

Work the final side in the same manner until you reach the first corner. DC in the first corner and join with a slip stitch to the chain directly above the beginning SC. 24 Shells and 4 corners made.
*(SC, chain 1), chain 3, 2DC* all in corner space. ***(Chain 3, SC in next chain 1 space) 6 times. Chain 3, (2DC, chain 3, 2DC) in corner space***
Repeat from *** to *** 2 more times. Work final side in same manner until you reach the first corner. DC in the first corner and join with a slip stitch to the chain directly above the beginning SC.
First motif border finished! You’ll now be joining all subsequent motifs in a join-as-you-go fashion, attaching them on the final round of the lace.
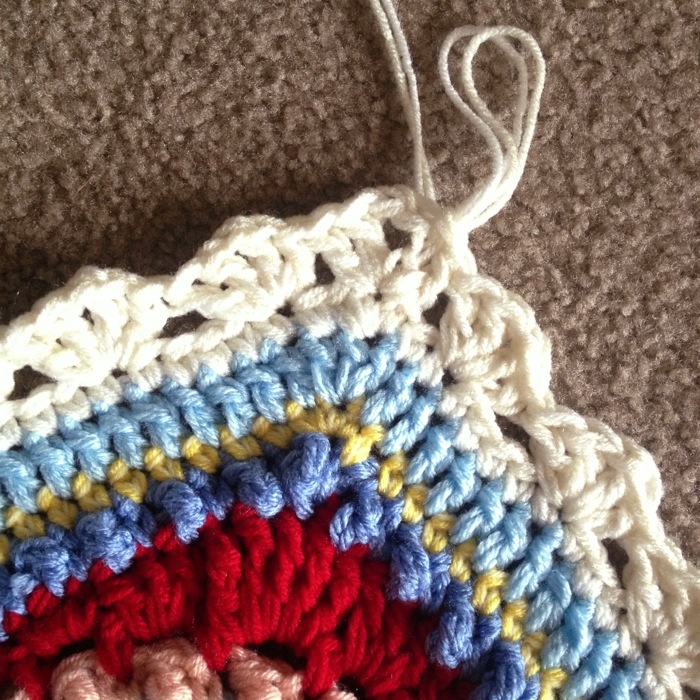
Work your second motif border all the way until you complete one side of the final round, ending with chain 1 of the second corner space – see photo below for the exact stopping point. The final stitch worked is a chain 1.
Release loop from hook. Insert hook in any corner space of first motif, put loop back on hook, work a chain to secure the corner join, then a final chain to complete the “chain 3” and 2DC in same corner space of the motif in progress.
To put it another way, you are working this second motif exactly as the first, but on the final round, you are pausing at the second chain of the chain 3 parts to make your join to the completed motif.
Now, chain 1, release loop from hook, insert hook in next chain space on completed motif and put loop back on hook. Now you are at the same spot that I am in the photo below.

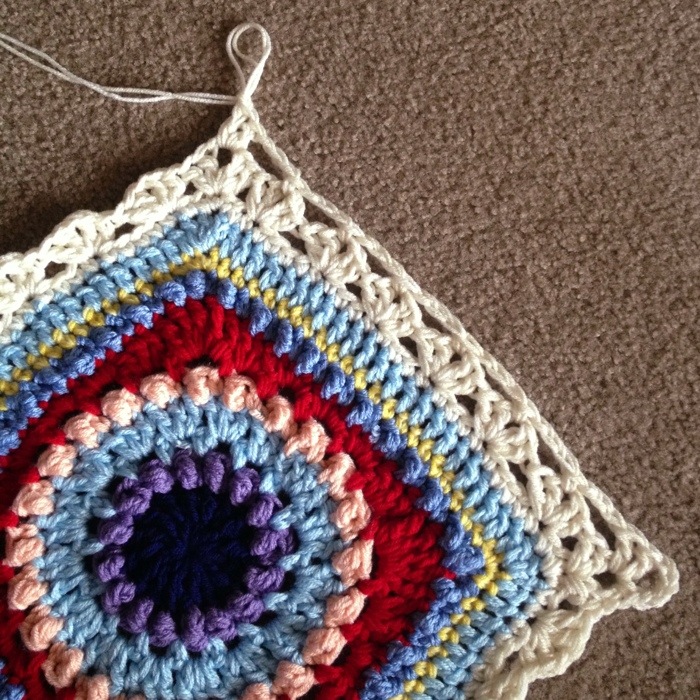
Chain 2, SC in the next chain 1 space, and work in this manner across, joining the chain spaces together, until you reach the corner. (2DC, chain 3, 2DC) in the corner. Do not join at this corner.
When I join my square motif blankets, my goal is to make a pretty detail where 4 corners meet. One of the ways that I make my decorative corners is that I do something a little different at these joins. (NOTE: Around the perimeter of the blanket, I go ahead and join corners immediately. Notice that in the photo below, the bottom right hand side corners are joined (perimeter), and the top left side ones are not.) When I am on the next row of squares, I will be picking up these corners.

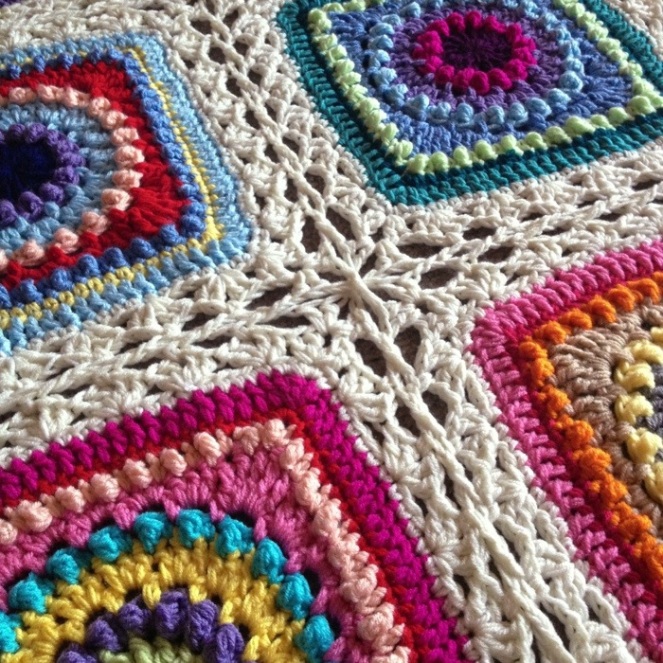
Show below is what the corner will look like once you have attached the next row of squares and picked up the diagonal corners. For a more detailed description of this joining method, and to see how I get my corners to do their magic thing, click here! 🙂


Just beautiful, as always!!
I just love the colours you use, thank you so much for sharing this new border pattern, so beautiful and definitely on my list of to do’s.
Thank you 🙂 It’s super-flexible – I’m glad you like it!
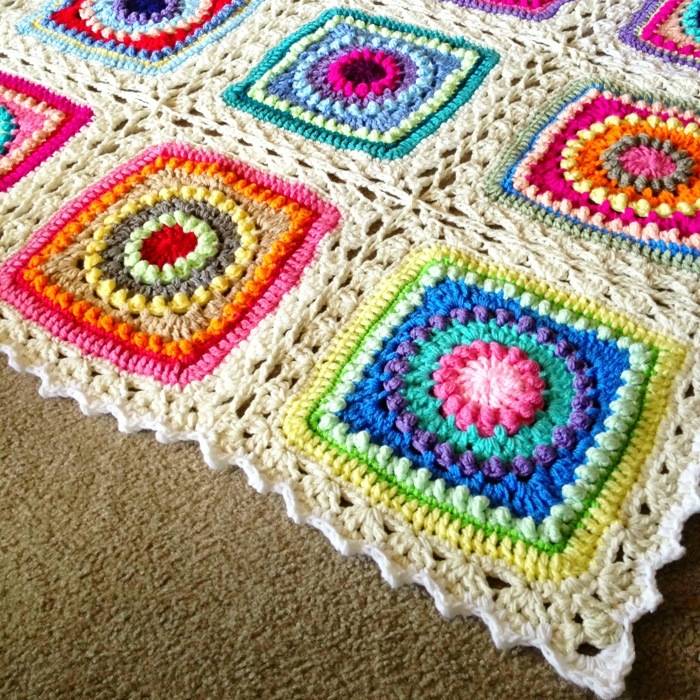
What did you do as the border (in white) of the whole afghan?
I don’t remember too, too well! But I think I did (3SC, picot) around and just a little 3DC, picot, 3DC in the corners. I’m not 100% sure though as this was a ways back! 😉